I get asked this question all the time. “How do I print the program template front and back?”
While the answer is straight forward for me (because I do it all the time), I can understand how it can be a little confusing at first, especially when the template shows front and back on the same side. I’m confident that after you follow the guide below, you’ll have a “duh” moment. Allow me to illustrate.
Take this floral program template for example:
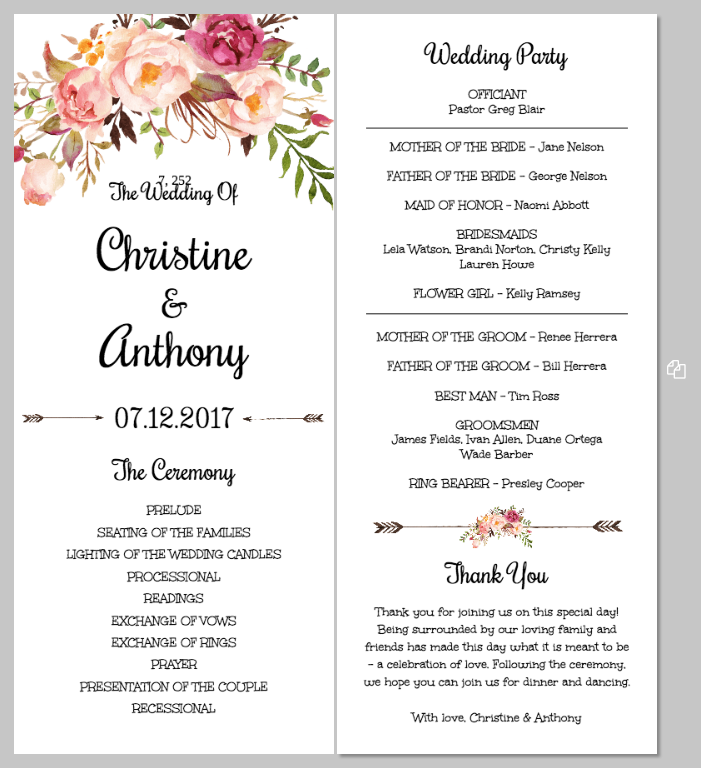
When you print this template, you’ll get front and back on the same side. So how do you get the front of the template on one side and the back of the template on the other side? It’s actually quite easy.
The short answer is: run it through the printer once, turn the card stock over and run it through the printer again on the reverse side.
I know that might be a little confusing at first so I’ll go into detail.
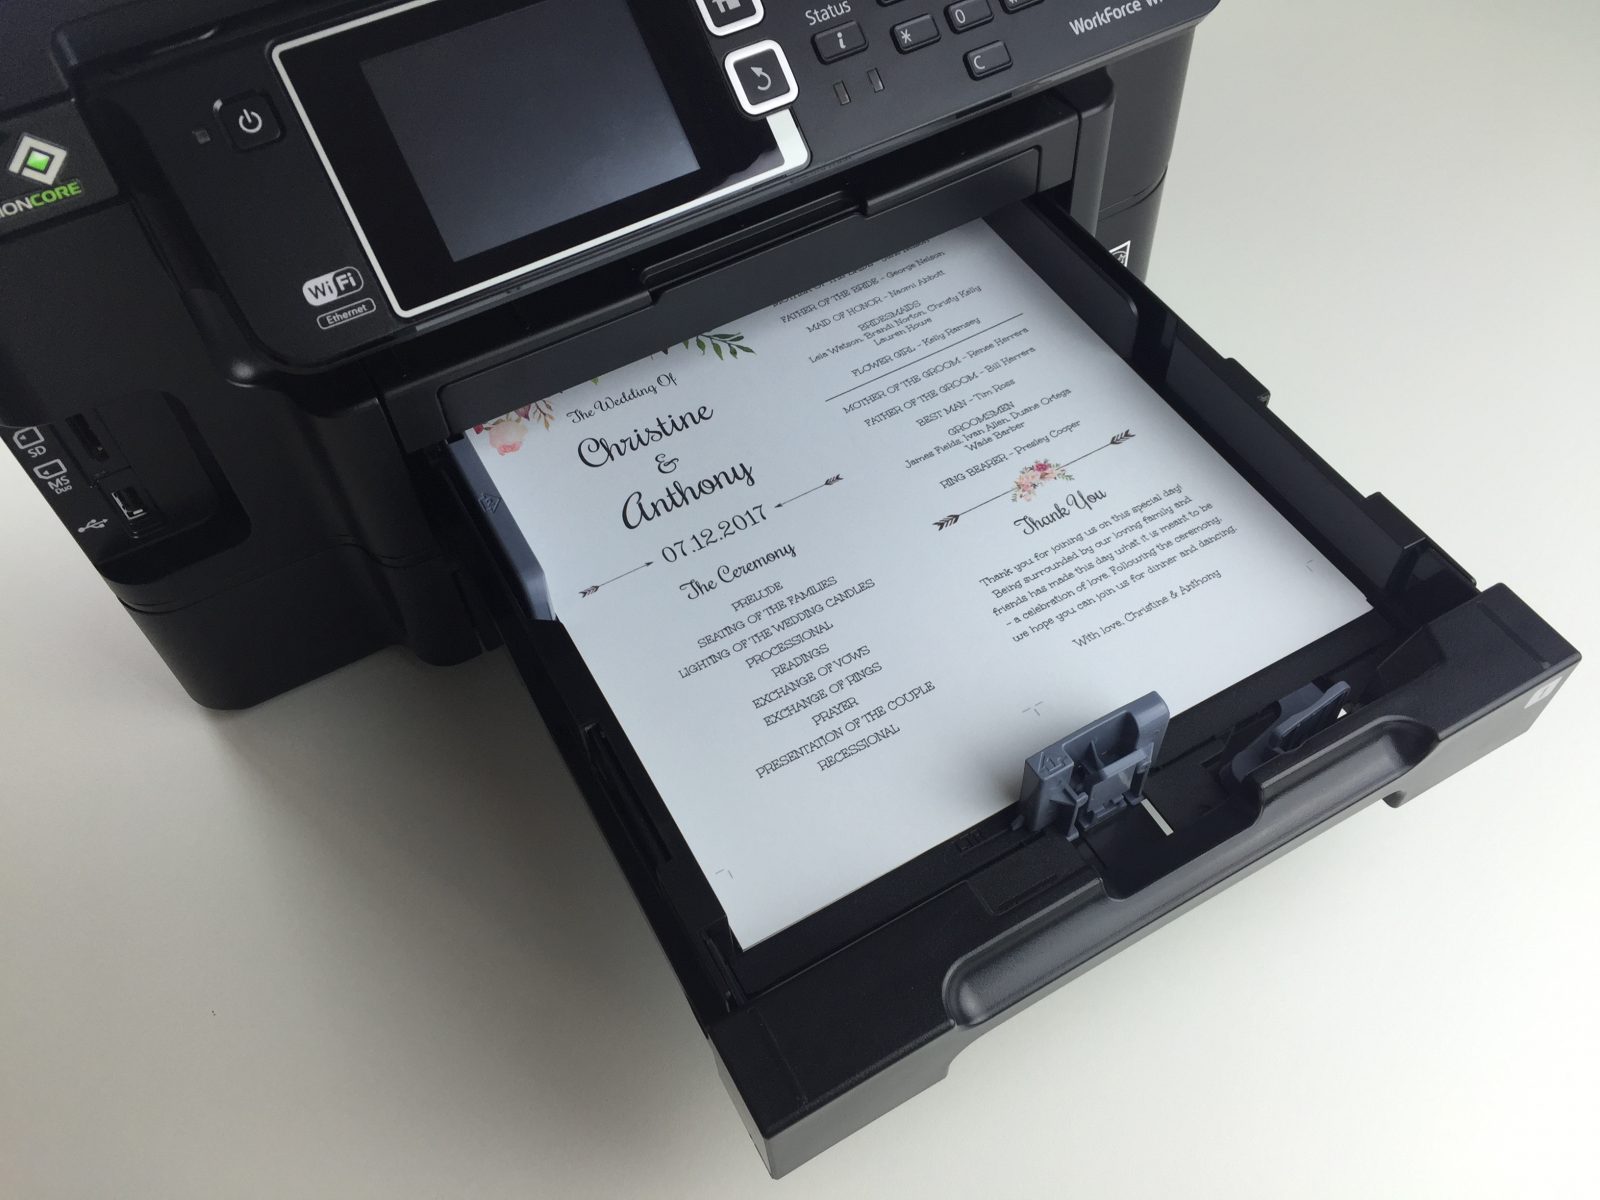
Step 1: Print the template
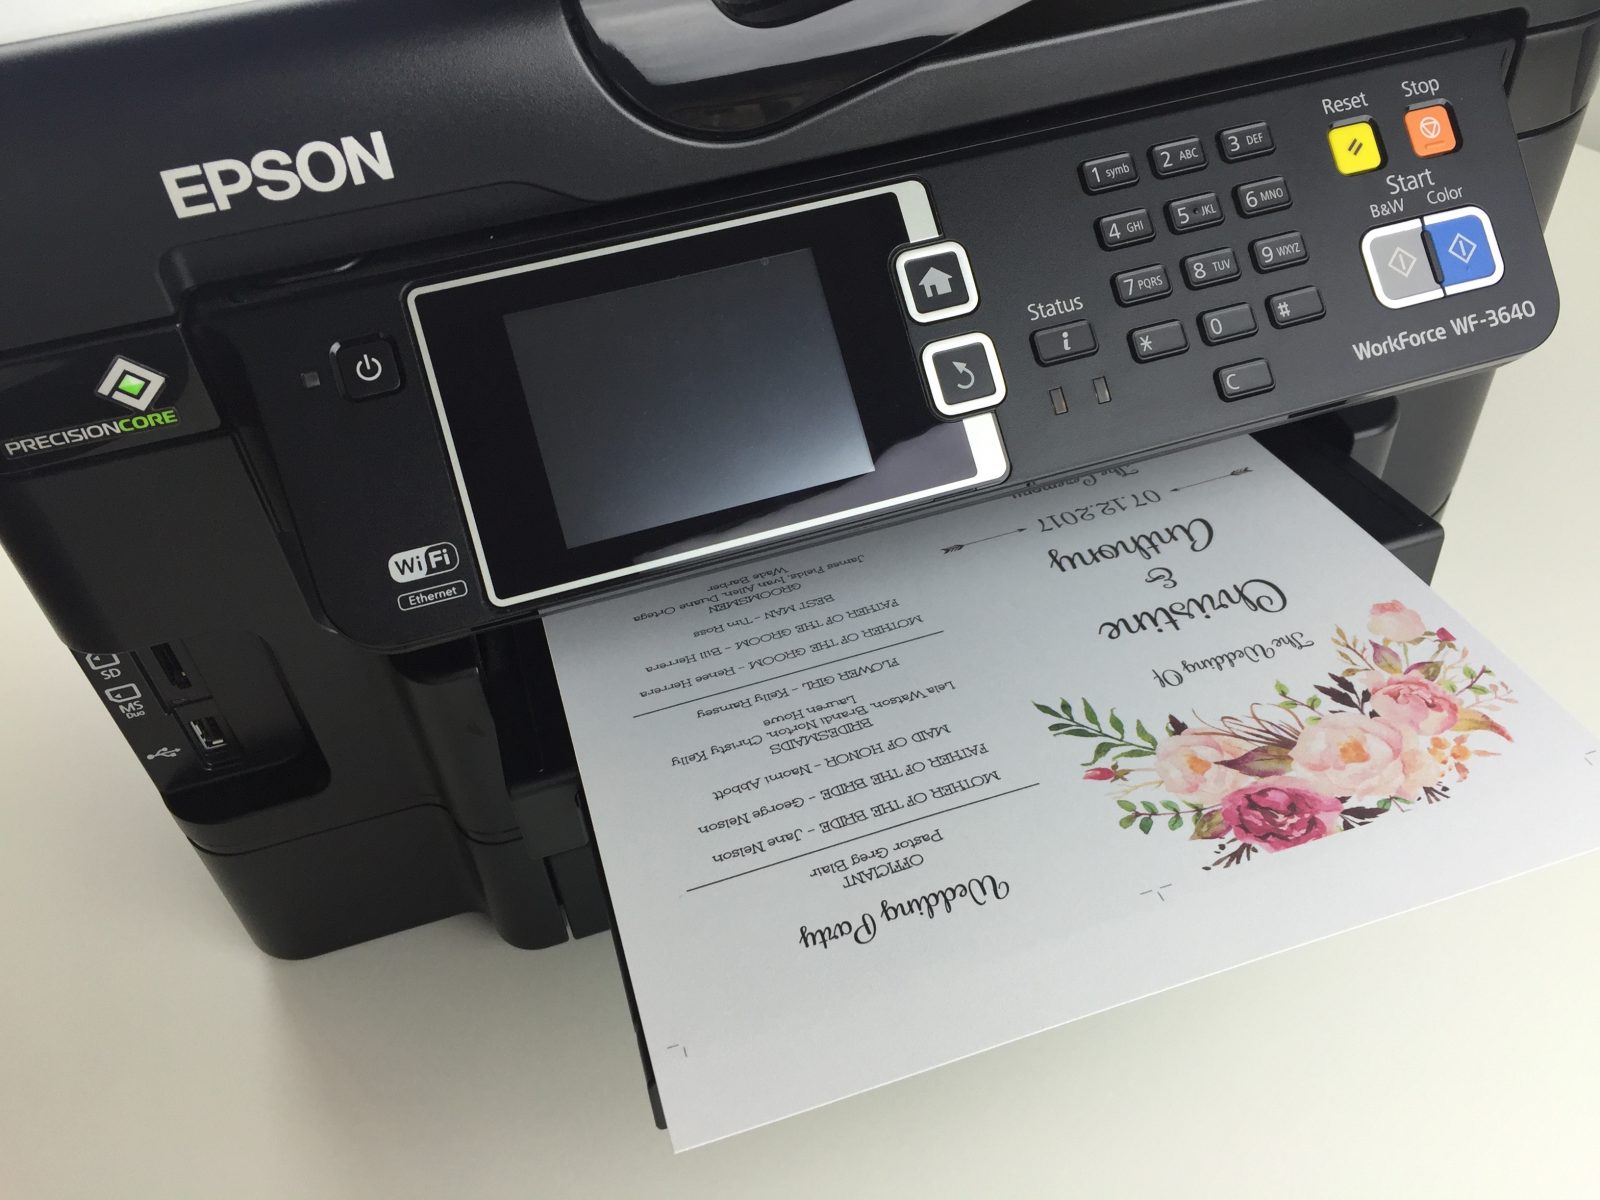
First, let’s print the first side of the template. You’ll have the front and back on this first side.
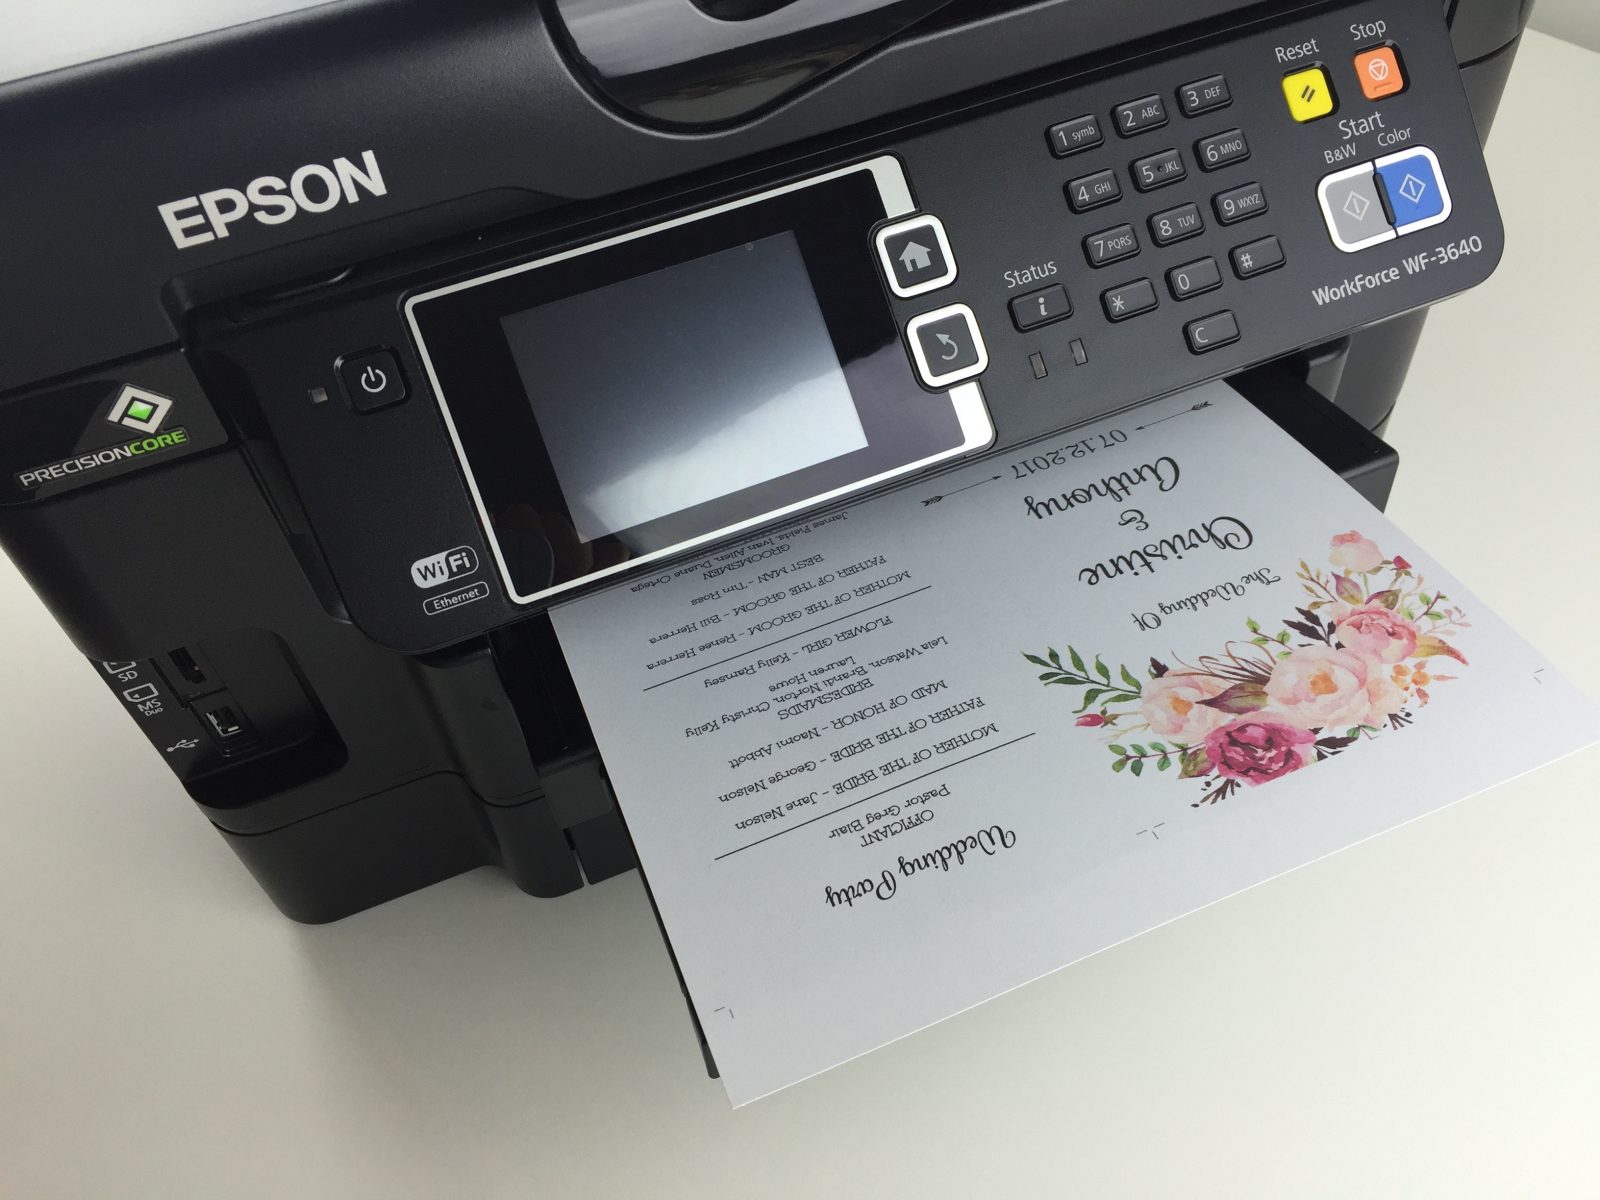
Step 2: Insert it back into the printer on the reverse side
Now you’ll want to insert the card stock back into the printer but be sure to do it in a way that will print the reverse side this time. So with my printer I’ll insert it like the picture below. So when I print it again, it will print the opposite side and both sides will be lined up correctly.
The main idea here is to think about how your printer pulls in the paper. It will pull it in and feed it around it’s roller to be printed on the reverse side. So by inserting it into the printer this way, it will print the other side.
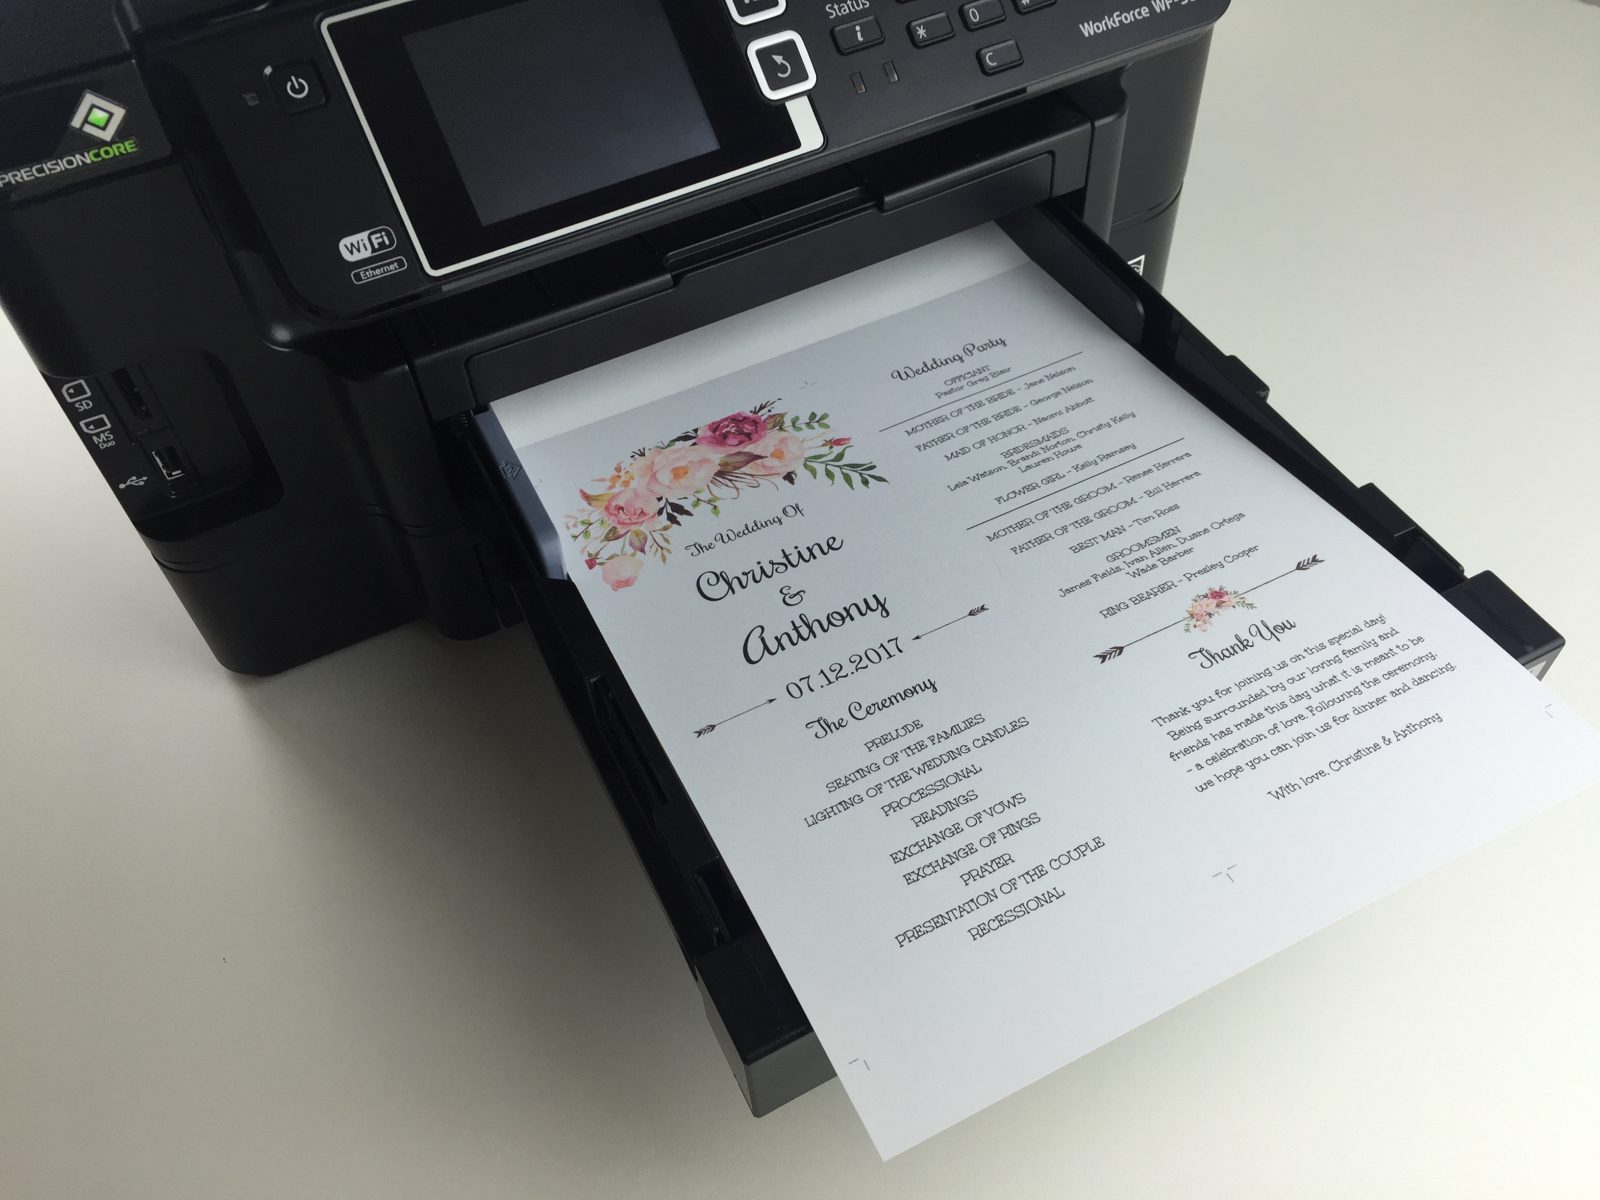
Step 3: Print it again
With the card stock back in the printer, print the template again. You’ll now have two templates per card stock paper and it will be printed on both sides.
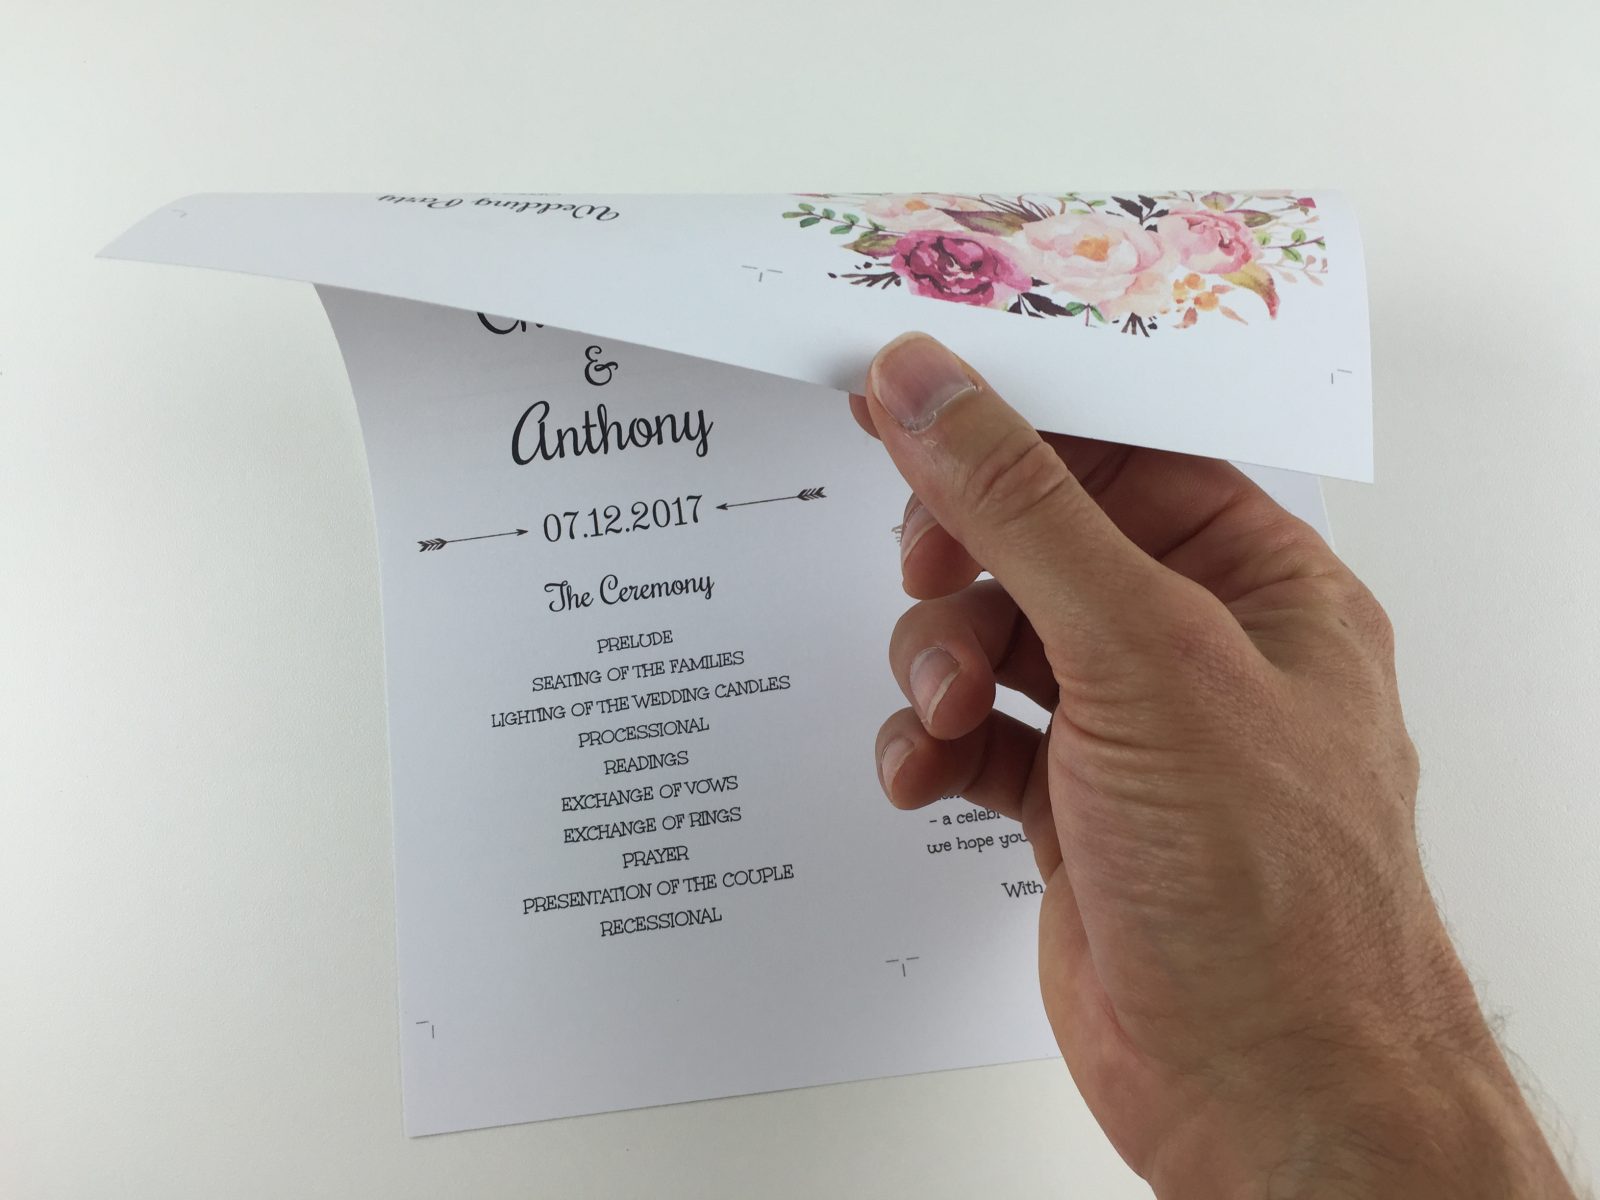
You should also notice that the fronts and backs of the template will match correctly. The front of one program will have the back of the same program on the reverse side. Now you’ll just need to trim the template.
Step 4: Trim
Trim the program template on the crop marks to have two programs as the finished result.
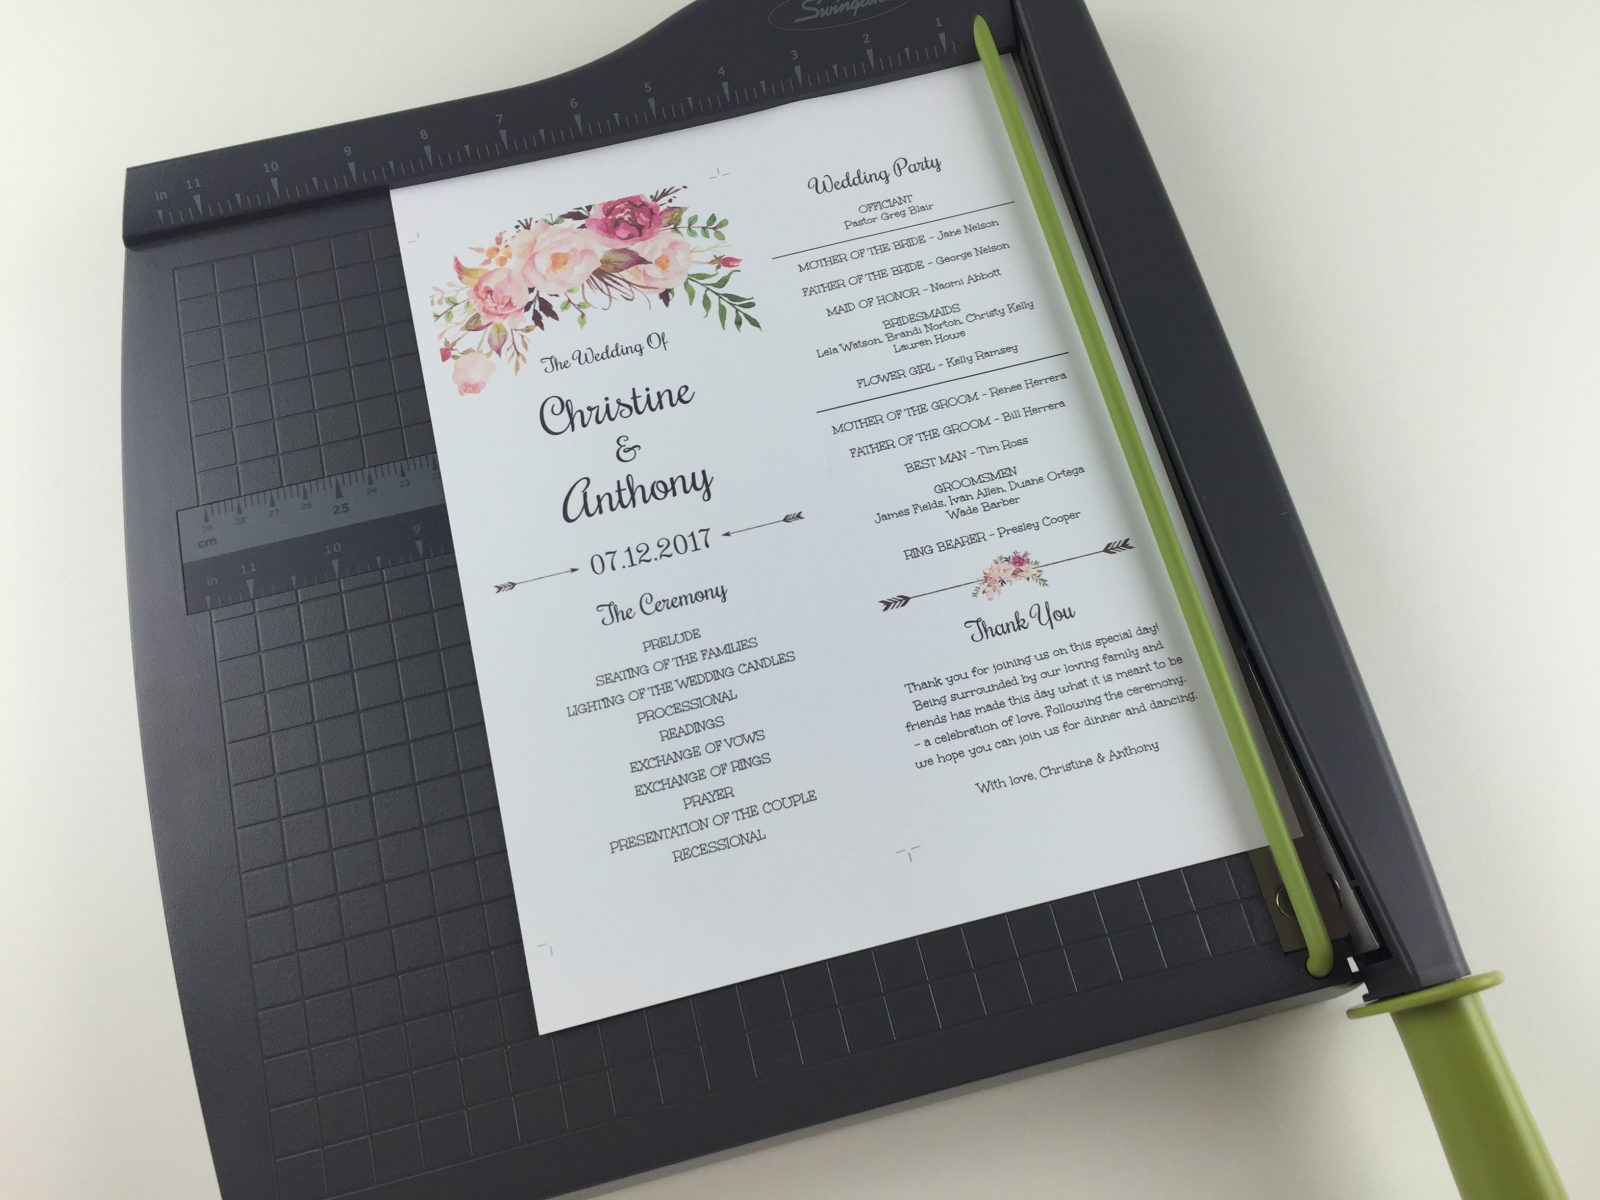
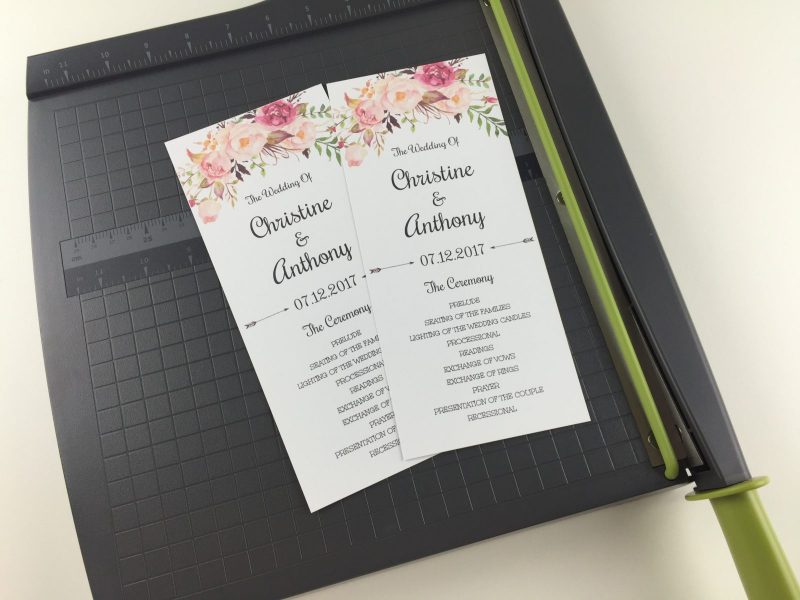
You’ll now have two programs printed front and back.

So as you can see it’s actually quite easy to get your programs printed on the front and back. You can even do the same thing with the program fan templates if you aren’t making fans with them. By printing two programs per piece of card stock paper, you can save a lot of paper!
Important things to consider with printing front and back
Printing two sided templates does not always achieve a perfect outcome. This is because home printers are not perfect. The paper can shift slightly in the printer as it’s being fed through and cause the front to not be perfectly aligned with the back of the template. When printing two sided templates, be sure to keep text and designs at least 1/4″ from the edge of the template that way if there are any misalignments when printing they will be less noticeable. Background images are ok to go off the template if that is part of the design. You should also consider getting two sides template printed professionally for the best results.